


Hey there! I'm a supplier of WPC Plug - In Fencing, and I often get asked, "Can I install WPC Plug - In Fencing by myself?" Well, let's dig into this question and find out.
Understanding WPC Plug - In Fencing
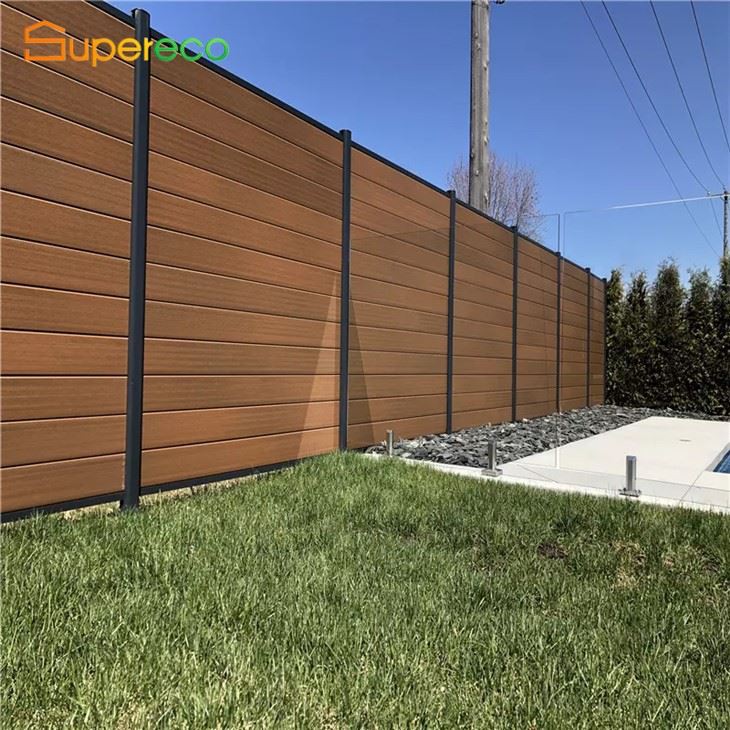
First off, what's WPC Plug - In Fencing? WPC stands for Wood - Plastic Composite. It combines the benefits of wood and plastic, giving you a durable, low - maintenance fencing option. Plug - In fencing means that the components are designed to fit together easily, like a big jigsaw puzzle.
WPC fencing is a great choice for many reasons. It's resistant to rot, insects, and the elements. Unlike traditional wood fencing, you don't have to worry about constant painting or staining. And it looks great! You can choose from different styles and colors to match your outdoor aesthetic. Whether you're looking for a Composite Privacy Fence to create a secluded backyard or a wpc Garden Fence to add some charm to your garden, WPC Plug - In Fencing has got you covered.

Assessing Your Skills
Now, let's talk about whether you can install it yourself. The first thing you need to do is assess your DIY skills. If you've done some basic home improvement projects before, like building a simple bookshelf or installing a light fixture, you're off to a good start. Installing WPC Plug - In Fencing involves some physical work, like digging post holes and lifting heavy panels, but it doesn't require advanced carpentry skills.
You'll need to be comfortable using basic tools. A tape measure, a level, a shovel, and a drill are the main tools you'll need. If you don't have these tools, you can either borrow them from a friend or rent them from a local hardware store.
Planning Your Installation
Before you start installing, you need to do some planning. First, measure the area where you want to install the fence. Make sure you know the exact dimensions so you can order the right amount of fencing materials. You'll also need to check your local building codes and regulations. Some areas have specific requirements for fence height, setbacks from property lines, and the type of materials you can use.
Once you have your measurements and have checked the regulations, it's time to order your materials. As a WPC Plug - In Fencing supplier, I can tell you that it's important to get high - quality materials. Cheaper options may seem like a good deal at first, but they may not last as long or look as good. You'll also need to order Privacy Fence Installation Accessories like posts, connectors, and screws.
The Installation Process
Let's break down the installation process step by step.
Step 1: Mark the Fence Line
Use stakes and string to mark the outline of where your fence will go. This will help you keep everything straight and ensure that your fence is installed in the right place.
Step 2: Dig Post Holes
The posts are the foundation of your fence, so it's important to get them right. Use a post hole digger to dig holes at the marked locations. The depth and diameter of the holes will depend on the height of your fence and the type of soil you have. As a general rule, the holes should be about one - third the height of the post deep.
Step 3: Set the Posts
Place the posts in the holes and use a level to make sure they are straight. Fill the holes with concrete or gravel to secure the posts in place. Let the concrete dry for at least 24 hours before proceeding.
Step 4: Install the Rails
Once the posts are set, it's time to install the rails. The rails are the horizontal pieces that connect the posts. Use the connectors provided with your fencing kit to attach the rails to the posts. Make sure the rails are level and evenly spaced.
Step 5: Attach the Panels
Now comes the fun part - attaching the panels. The panels are designed to plug into the rails, so it's a relatively simple process. Just align the panels with the rails and push them into place. You may need to use a rubber mallet to gently tap the panels into position.
Step 6: Add Finishing Touches
Once all the panels are installed, you can add any finishing touches, like caps on the posts or decorative elements. This will give your fence a polished look.
Challenges You Might Face
Of course, installing WPC Plug - In Fencing isn't always a walk in the park. You might encounter some challenges along the way. For example, if you have rocky or hard - packed soil, digging the post holes can be difficult. In this case, you may need to use a power auger or hire a professional to dig the holes for you.
Another challenge could be dealing with uneven ground. If your yard isn't perfectly level, you'll need to adjust the height of the posts and panels to make sure the fence looks straight. This may require some extra planning and measurement.
When to Call a Professional
While many people can install WPC Plug - In Fencing themselves, there are some situations where it's better to call a professional. If you're not comfortable using tools or doing physical work, or if you have a large or complex fencing project, it's probably a good idea to hire someone with experience. A professional installer can ensure that your fence is installed correctly and safely, and they can also help you deal with any unexpected issues that may arise.
Conclusion
So, can you install WPC Plug - In Fencing by yourself? The answer is yes, in most cases. With a little planning, some basic DIY skills, and the right tools, you can install a beautiful and functional fence in your yard. However, it's important to be realistic about your abilities and to know when to call in the professionals.
If you're interested in purchasing WPC Plug - In Fencing or have any questions about the installation process, feel free to reach out. I'm here to help you every step of the way. Whether you're a seasoned DIYer or a first - time fence installer, I can provide you with the high - quality materials and expert advice you need to make your project a success.
References
- General knowledge of WPC fencing installation from industry experience.
- Information on home improvement tools and techniques from common DIY resources.